[The New Menu Cycle page provides everything you need to work with your menu cycle, right here where you need it. Create it, save it, test it, tweak it, and then publish it when you're ready to use it in production.]
-> Go To: Nutrition & Menu > Menu Planning > Menu Cycles > New Menu Cycle
 |
 |
Creating a New Menu Cycle
Information
 |
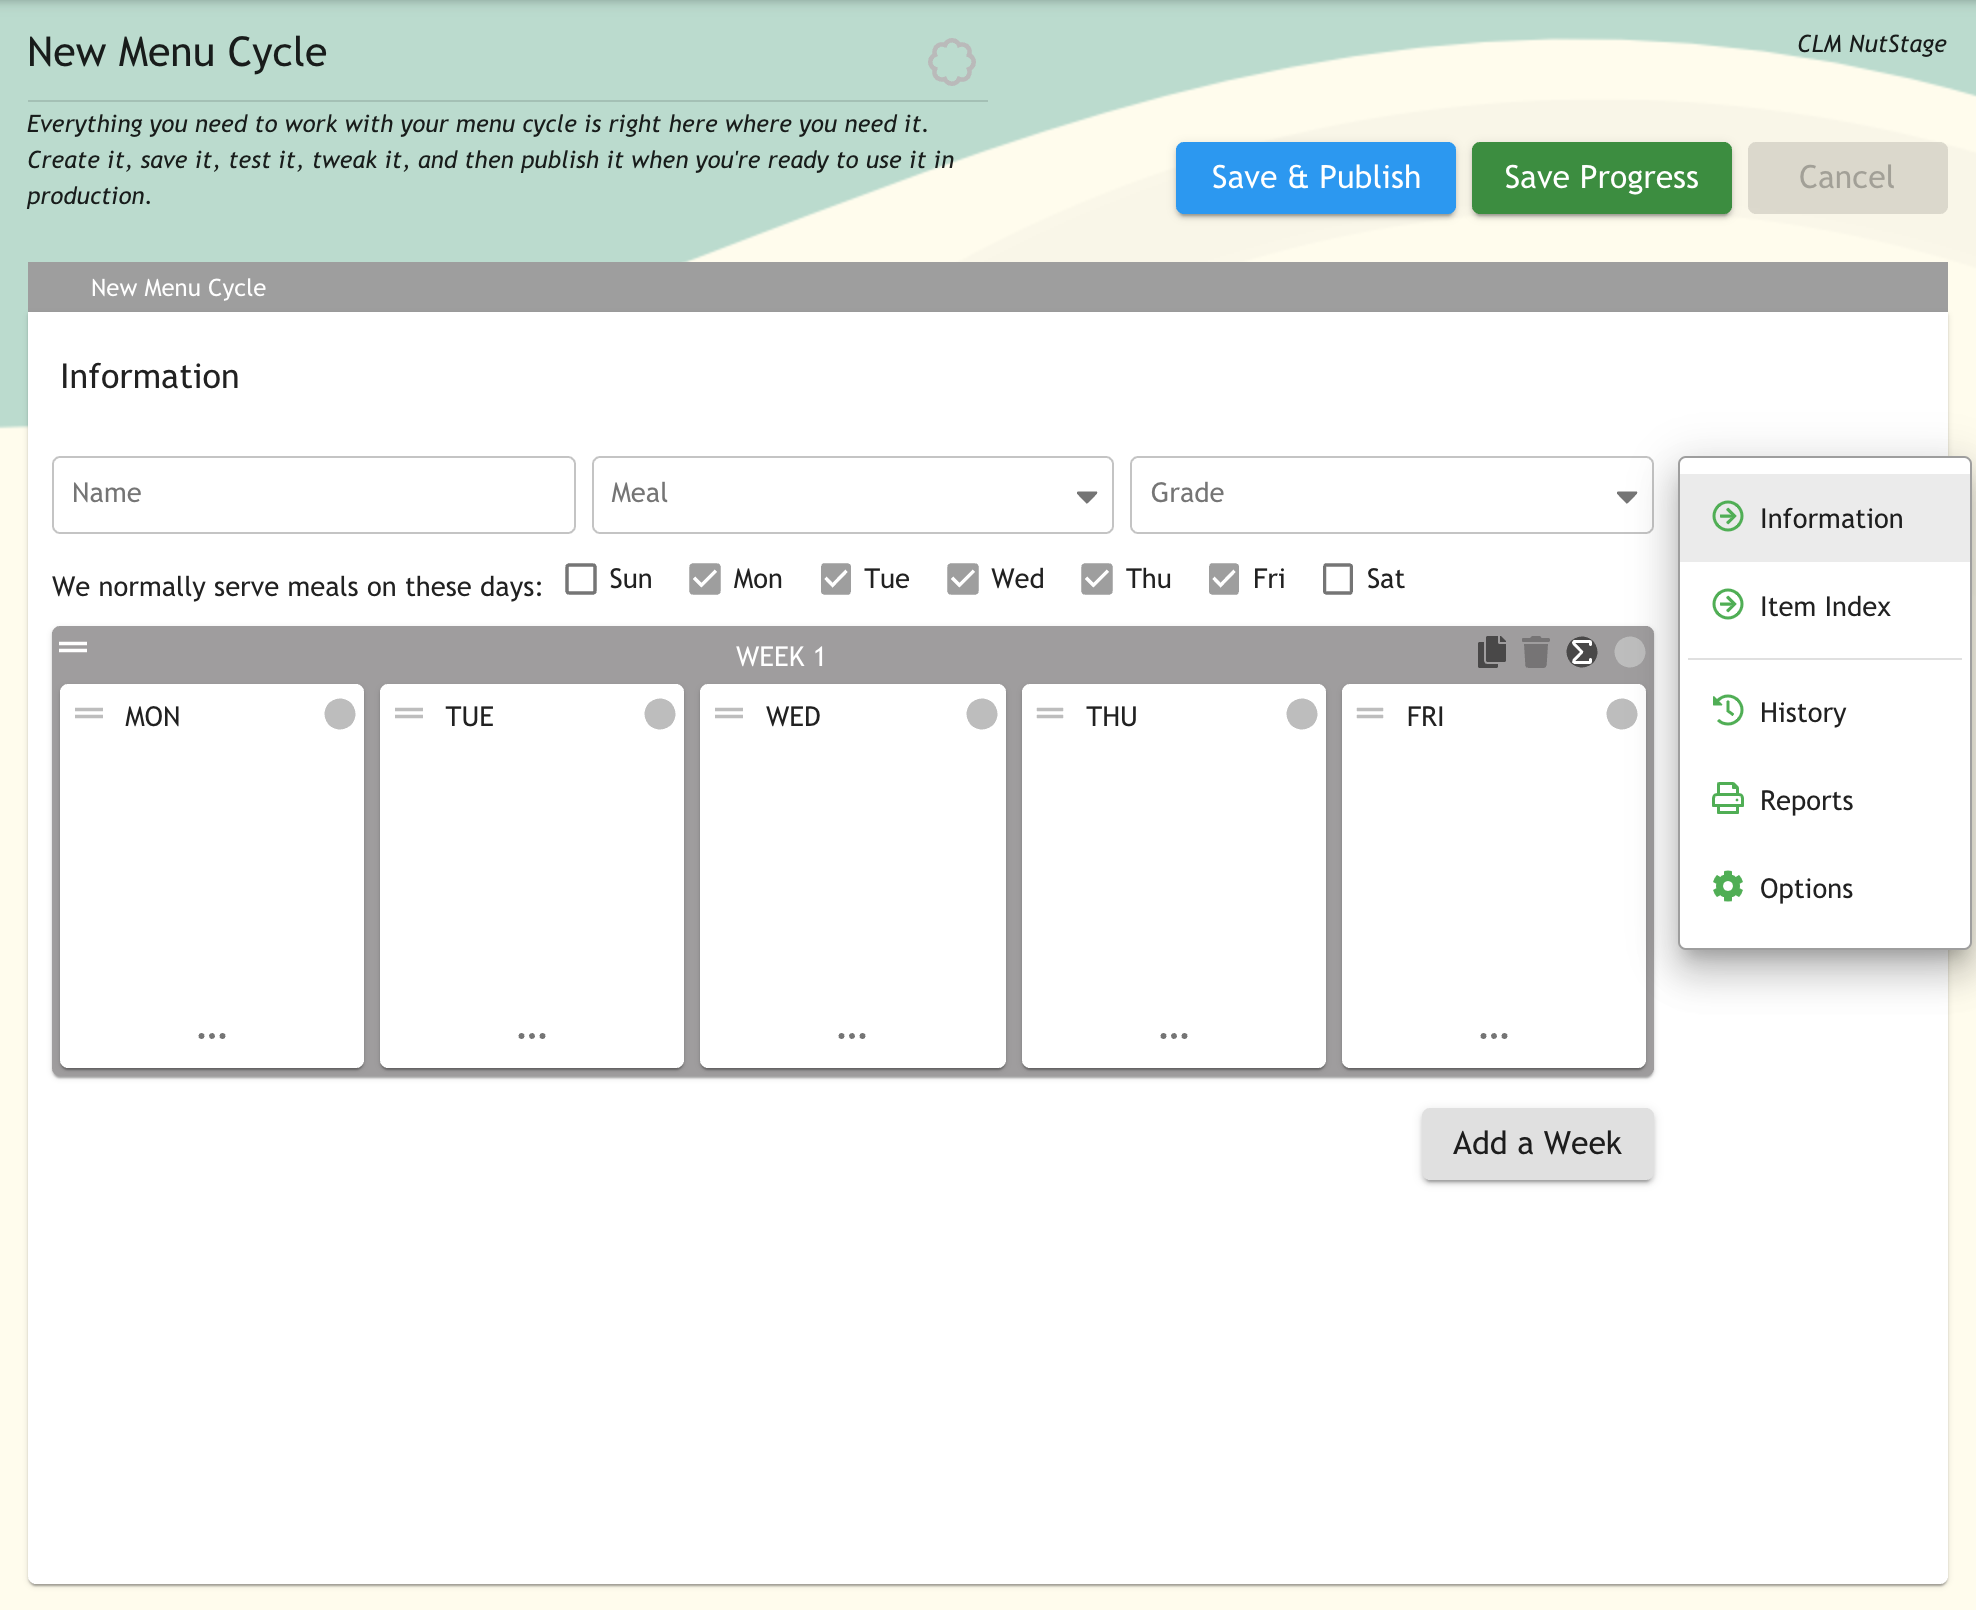
The Information page is used to design your menu cycles and is presented in a calendar style format for ease of use. One week is displayed by default, however, multiple weeks can be added to any menu cycle.
1. Enter the Name of your Menu Cycle, choose the Meal type (such as Breakfast or Lunch) and select the Grade (or Grade range) that the menu cycles apples to.
2. Check the provided boxes to select the days of the week that meals are served.
3. To start populating your menu cycle, click on a day of the week in the calendar:
 |
Fields for entering total projected student meals, adult meals and a la carte offerings are provided along with Individual sections to add Entrees, Sides, Fluid Milk, Condiments and Extras (Non Contributing).
The required food type contributions, caloric intake, saturated fats, trans fats and sodium intake are displayed in the panel to the right. Using Analysis will display the values of your chosen menu items as they compare to these requirements.
 |
4. Enter the number of Projected Student Meals, Adult Meals and A La Carte offerings for the day's menu:
 |
5. To add a recipe, such as an Entree, click Add Recipe in the Entrees section and search for a recipe:
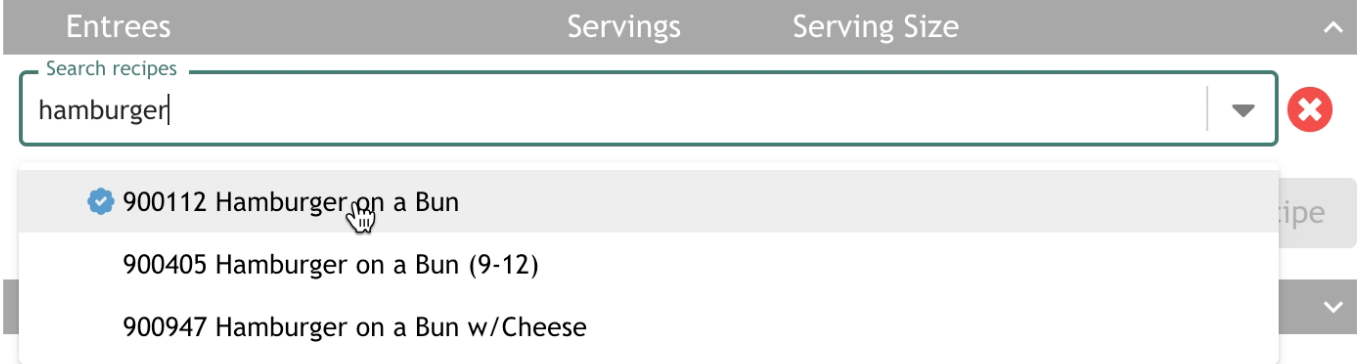 |
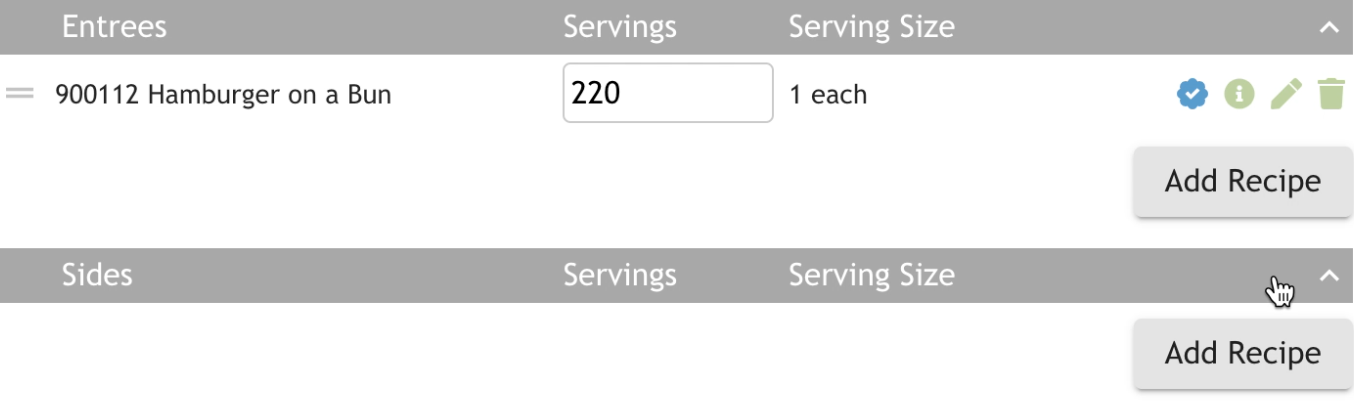
6. One you've selected your recipe, enter the total number of the servings to prepare for the day:
 |
To see more information about the recipe you selected, click the i (info) icon.
To change the serving size, click the pencil icon.
7. Repeat this process to add additional Entrees, Sides, Fluid milk, Condiments or Extras.
Note: Since each section is collapsable, you may need to open it before adding recipes. Click the handle in the right of the dropdown bar to reveal it:
 |
While populating your menu, you may want to see how close you are to meeting your nutritional requirements. You can run Analysis at any time in the process of building your menu cycle.
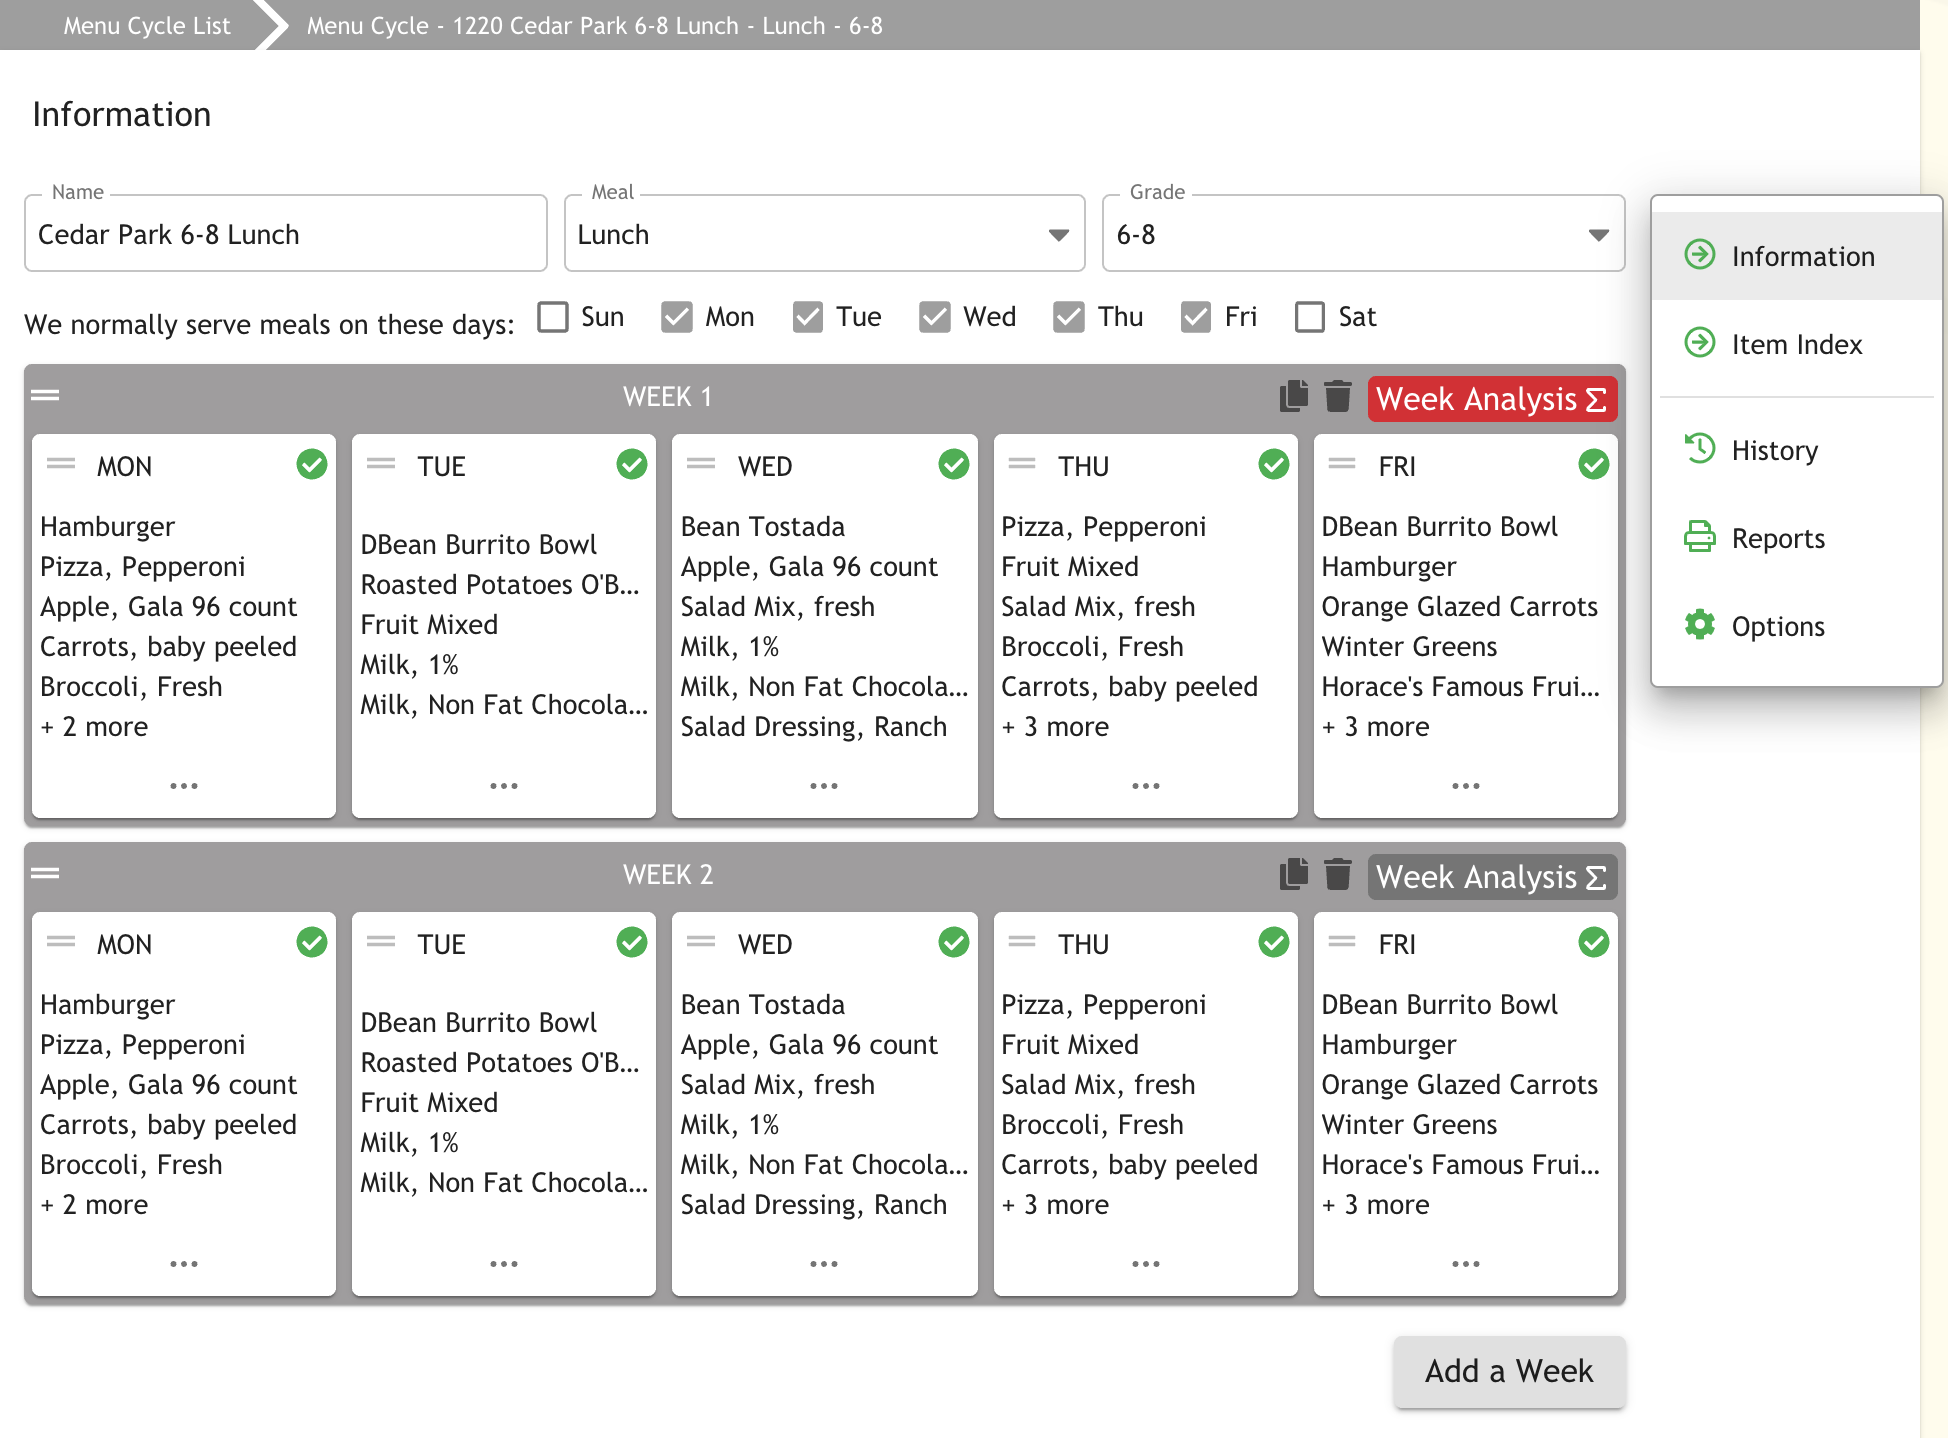
8. Click Analyze Day at the bottom right of the page to see if you've met your nutritional requirements:
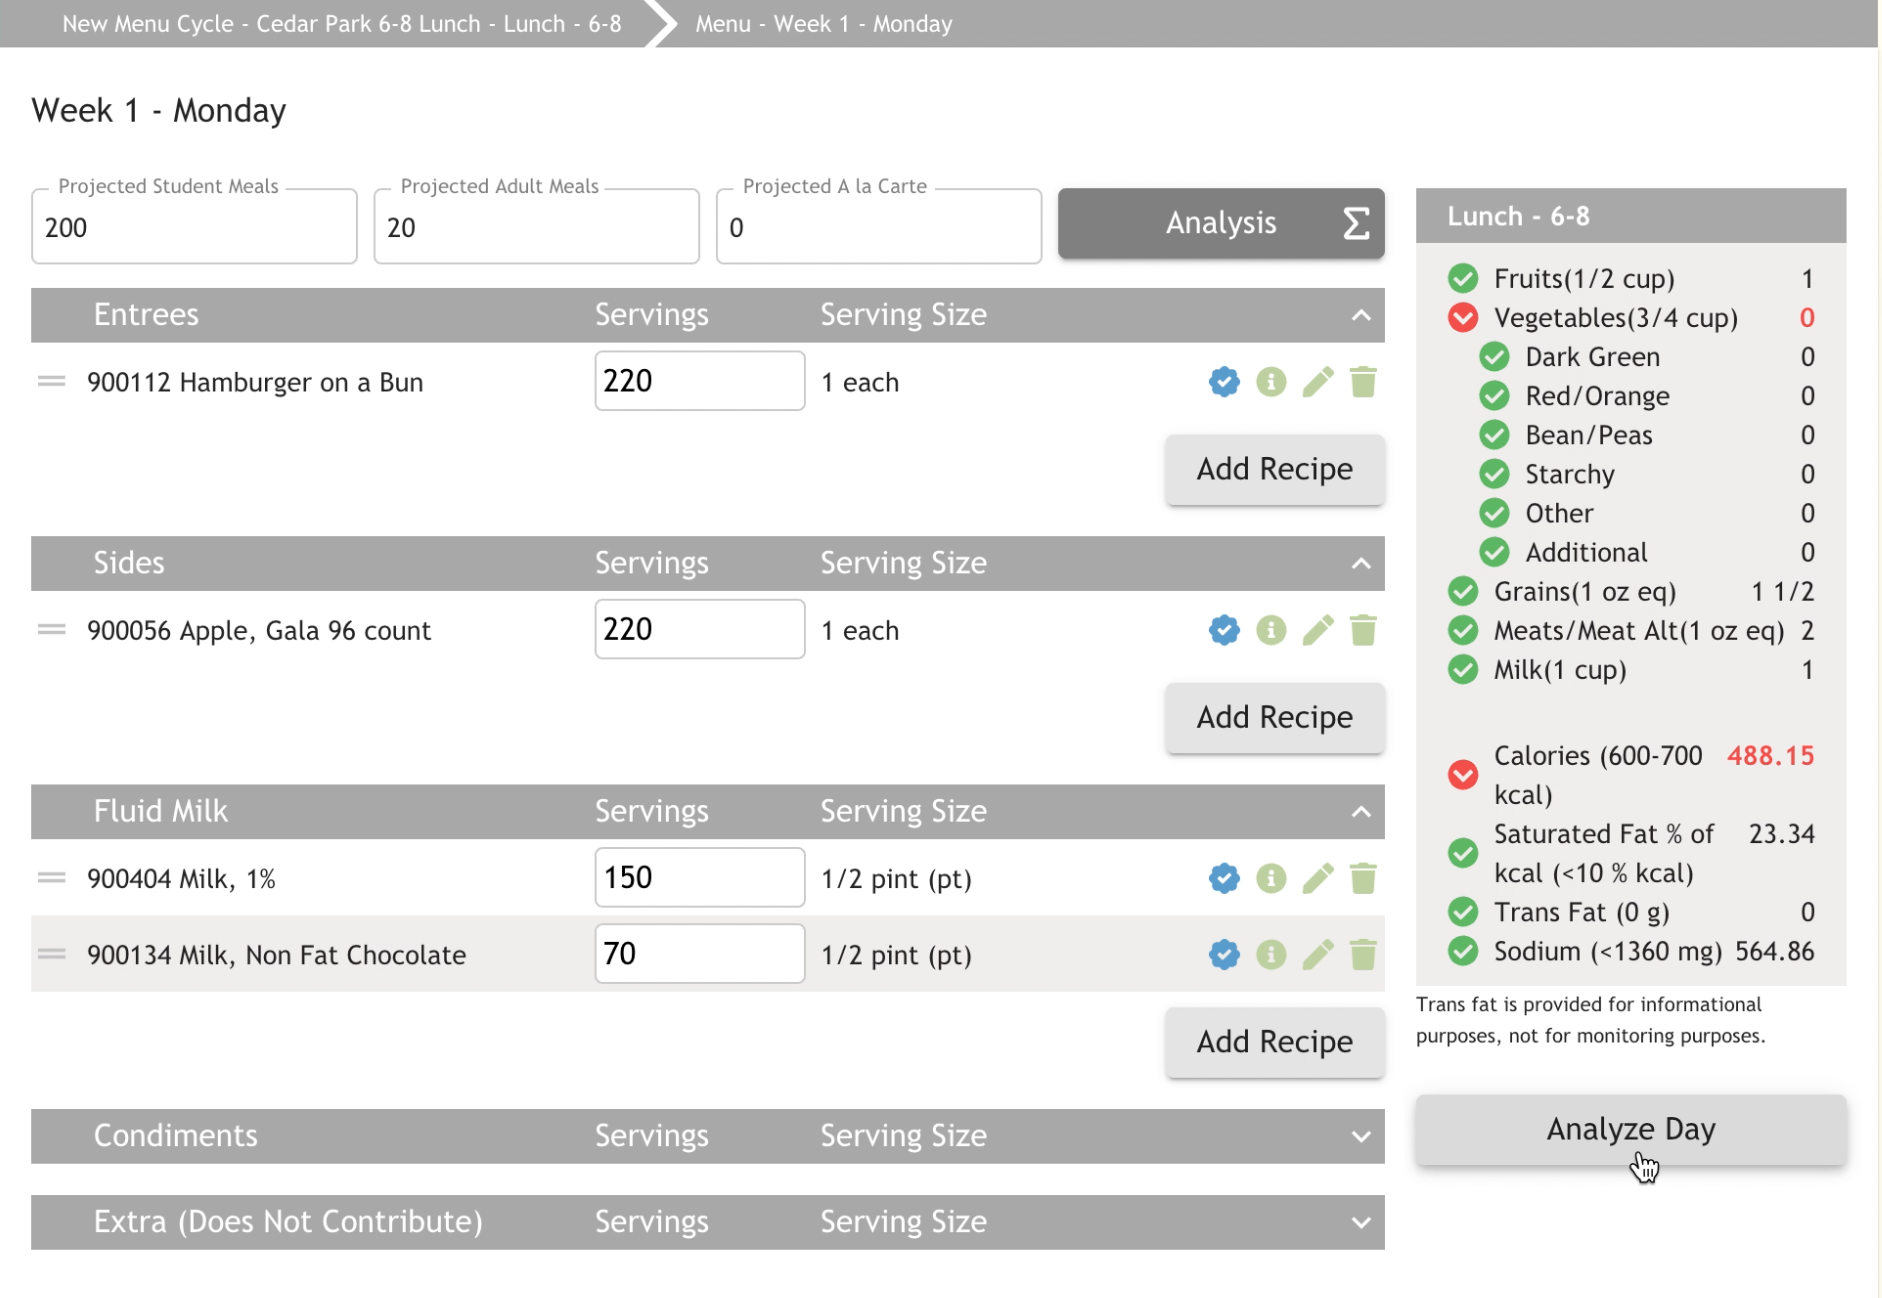 |
A green circle with a checkmark indicates that you've met your requirement. A red circle means that you are either over or under the requirement, depending on whether the arrow is facing up or down. When all of your requirements are met, all circles will be green.