[Everything you need to work with your recipe is right here where you need it. Create it, save it, test it, tweak it, and then publish it when you're ready to add it to your menu.]
TABLE OF CONTENTS
- Creating a New Recipe
- Information
- Ingredients
- Directions
- Nutrients
- Contribution
- History
- Documents
- Reports
- Options
-> Go To: Nutrition & Menu > Menu Planning > Recipes > New Recipe
 |
 |
Creating a New Recipe
Information
 |
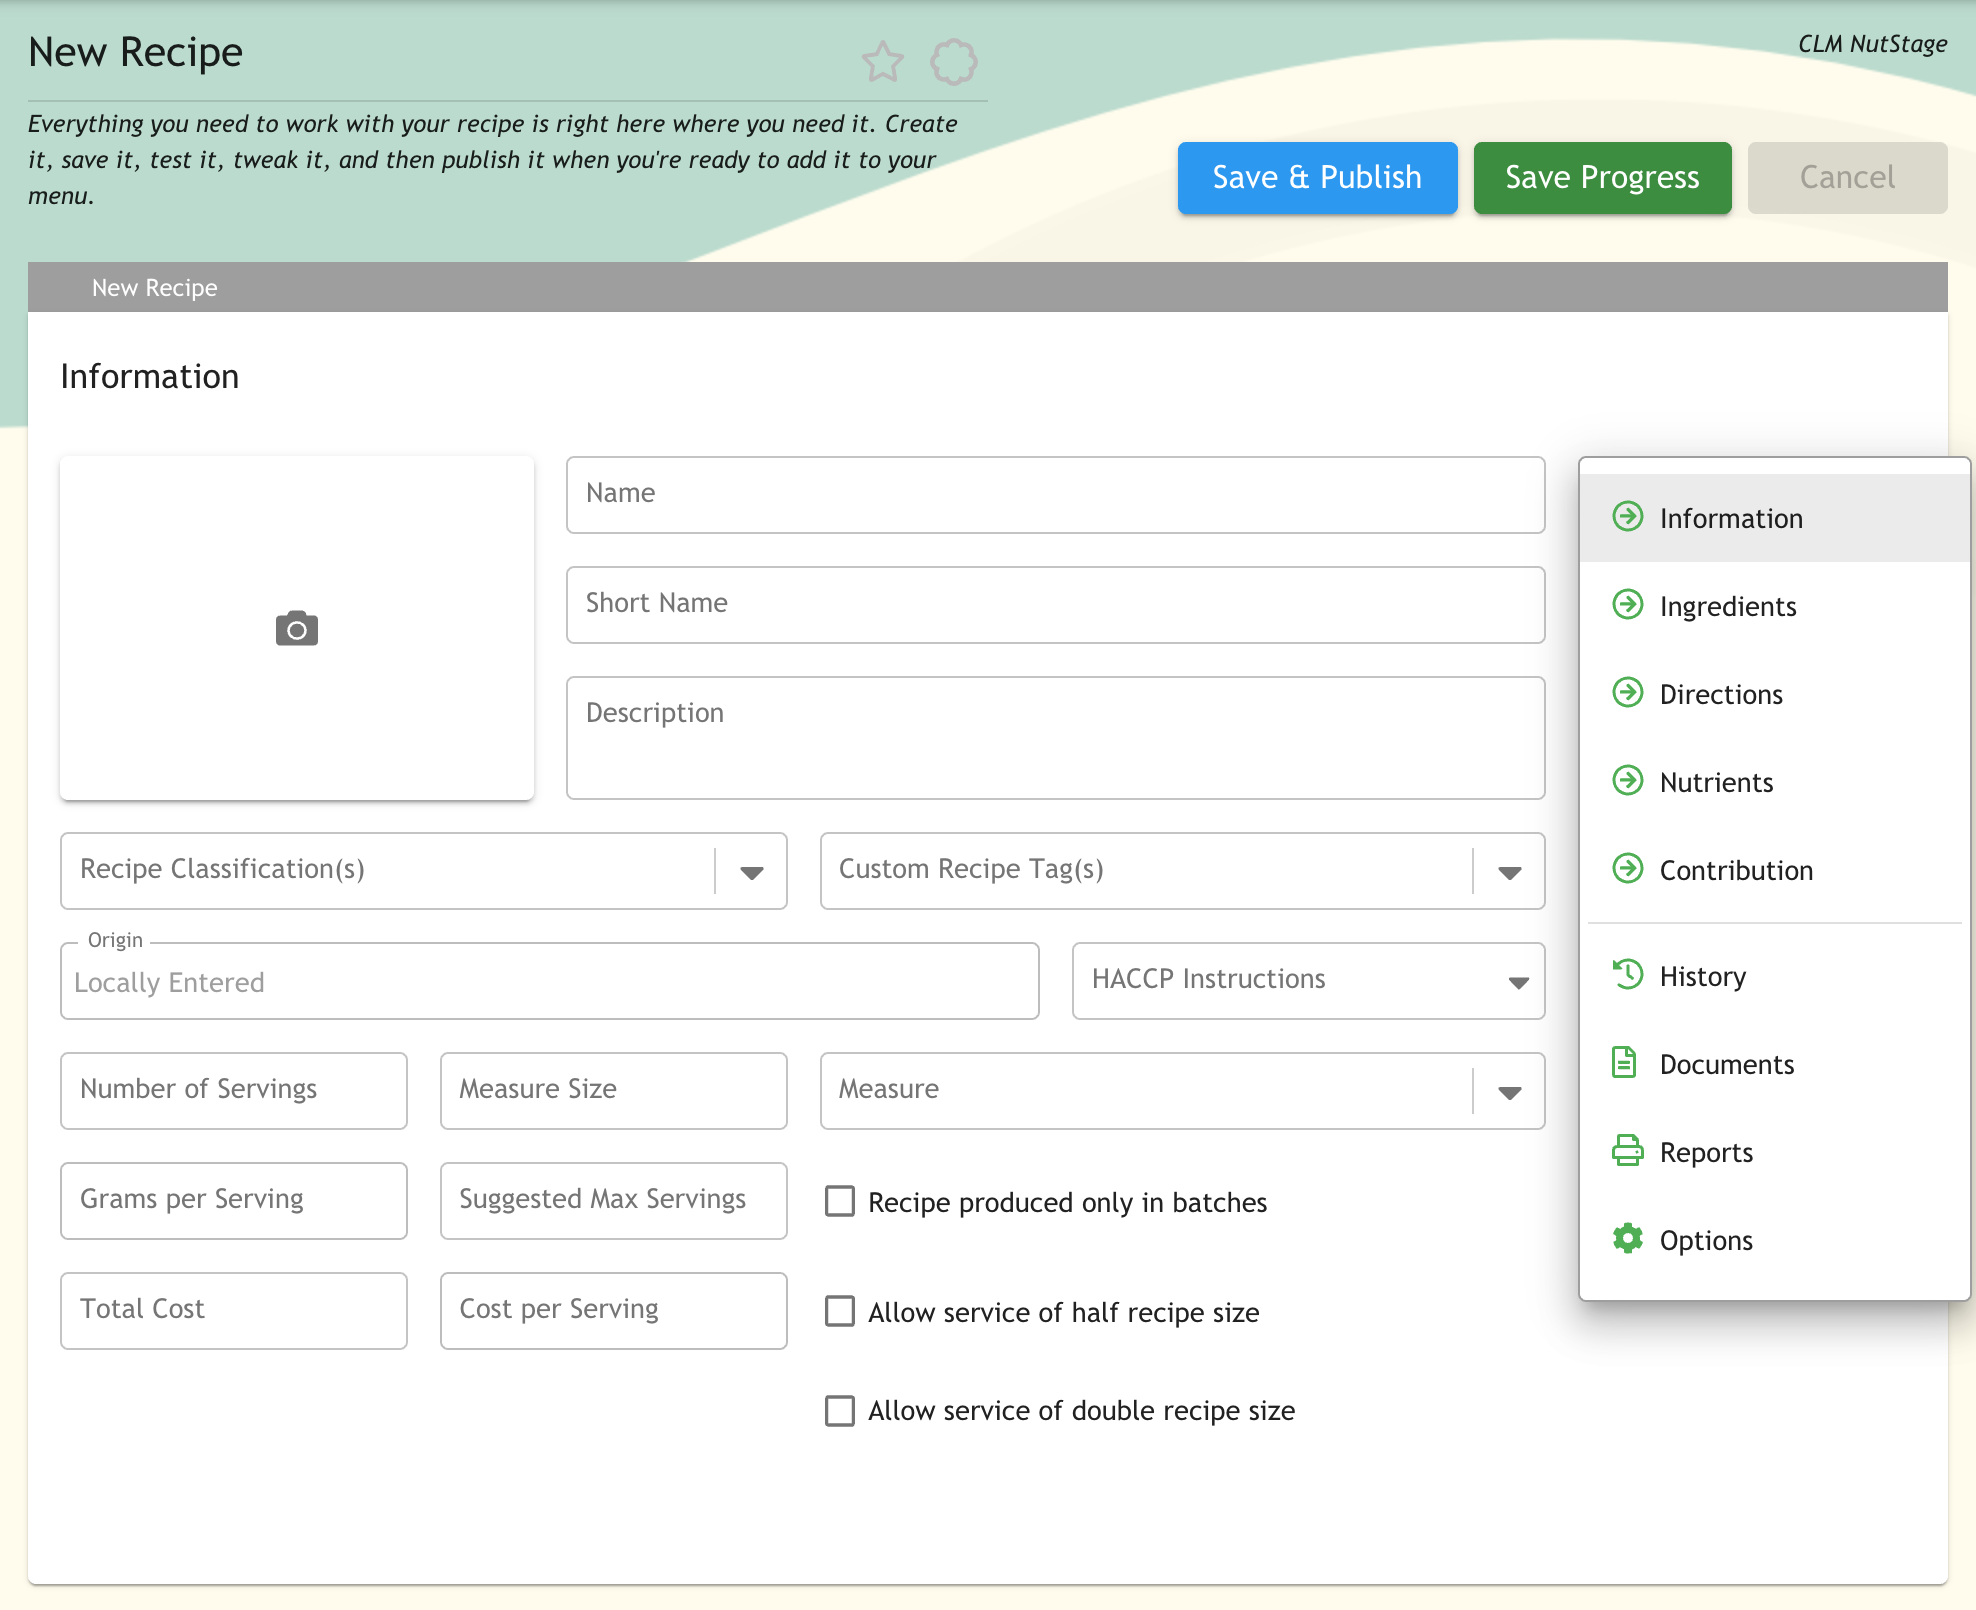
The Information page provides titled fields and dropdown menus for inputting information pertaining to your recipe. Not all fields are required, however it's best practice to add as much information as possible.
1. Enter all New Recipe information in the provided fields.
2. Select a Recipe Classification and/or a Custom Recipe Tag.
| NOTE: To use a Custom Recipe tag, you must first add them to MealTime on the Custom Recipe Tags page located in Nutrition & Menu > Settings. |
3. If the recipe includes HACCP instructions, select them from the HACCP dropdown menu.
4. Enter the Number of Servings, Measure Size and select a Measure Unit.
5. Enter any additional information about your recipe that you would like to include, such as Grams Per Serving, Suggested Max Servings, Total Cost or Cost per Serving.
6. If you would like to limit your recipe production to only batches of the entered Number of Servings, Allow service of half recipe sizes or Allow service of double recipe sizes, check the provided boxes.
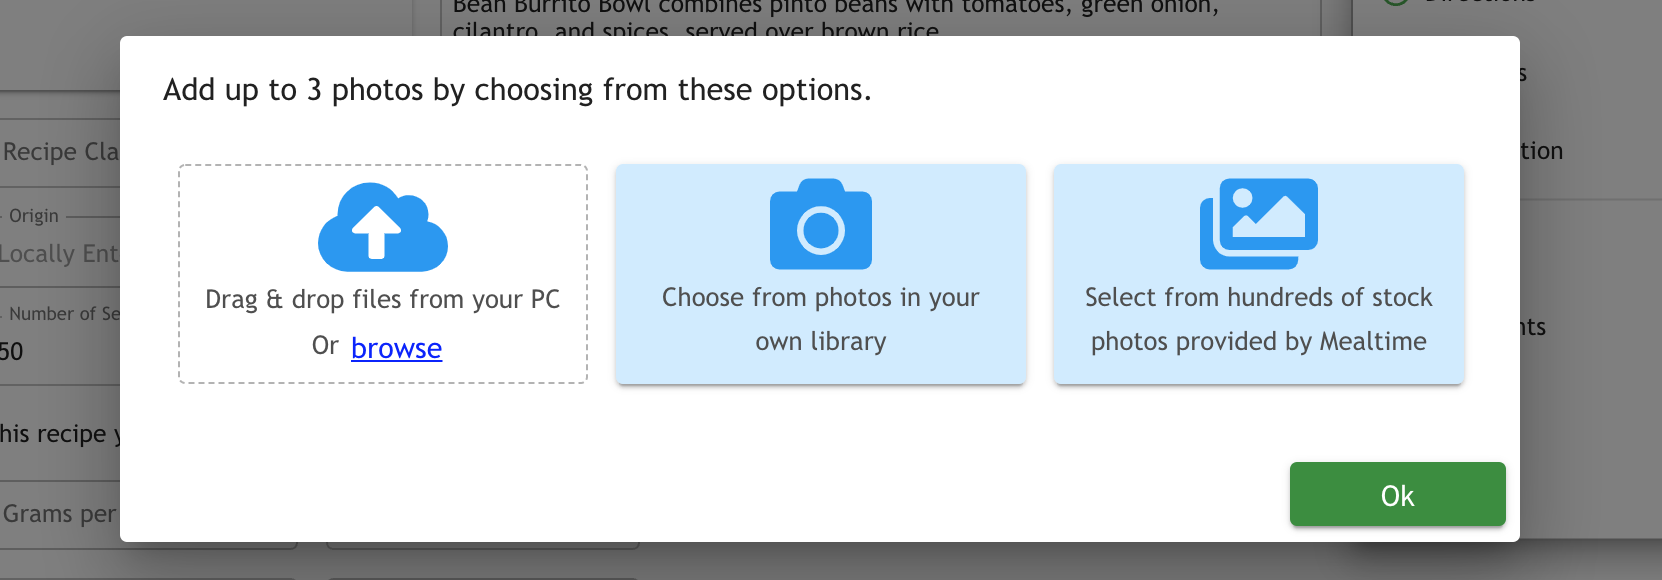
7. To add an image to your New Recipe, click the camera icon and select one of the following options:
 |
8. When complete, click Ingredients in the navigation menu on the right. Note that you can save your progress at any time by clicking Save Progress at the top of the page.
Ingredients
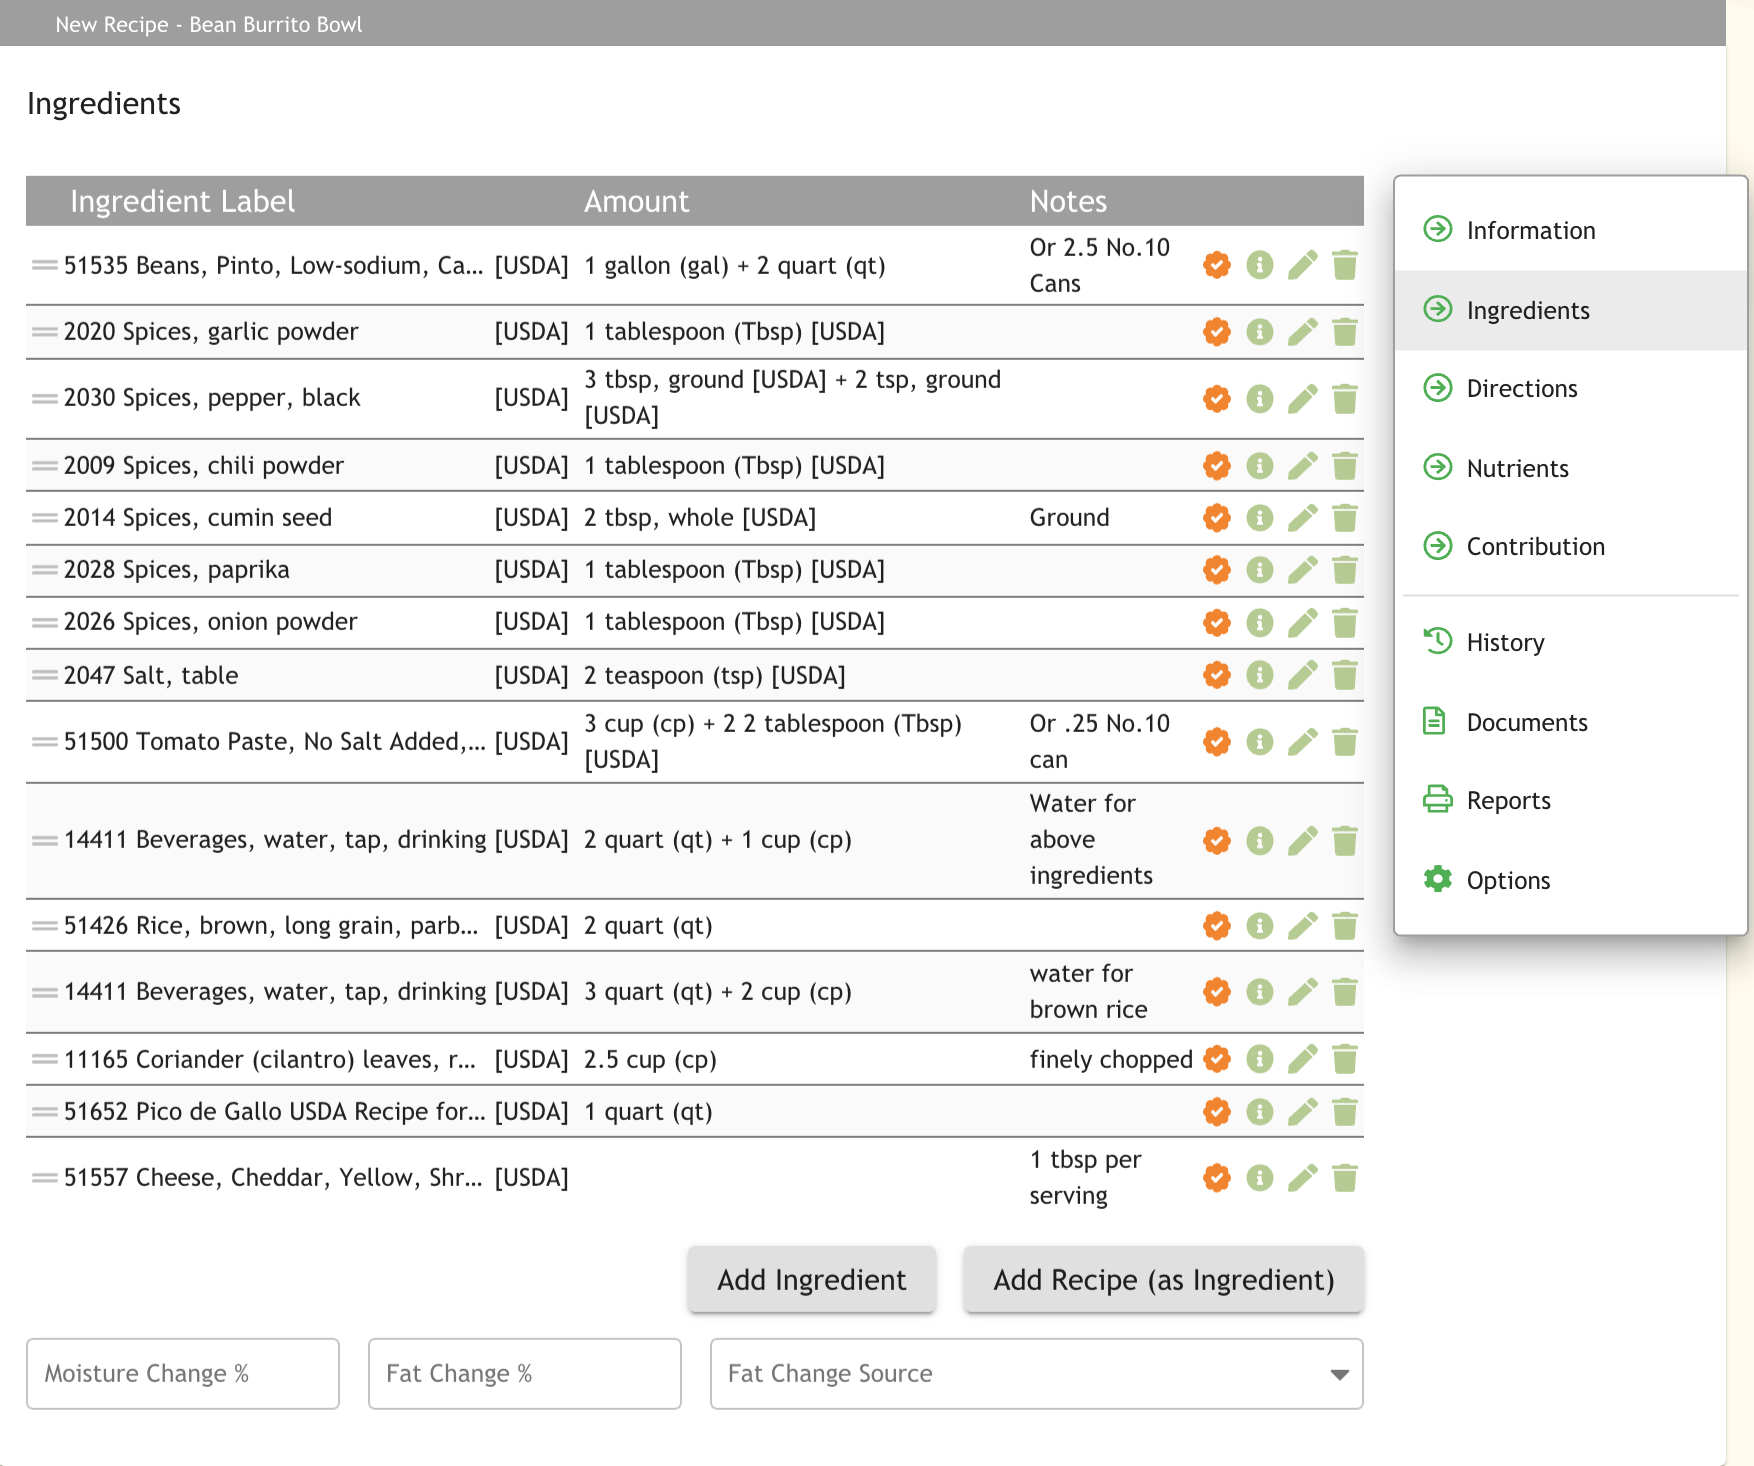 |
The Ingredients page is used to add the ingredients that make up your recipe.
9. Click Add Ingredient or Add Recipe (as Ingredient).
10. When adding an ingredient, you are provided with a search bar for locating your ingredient as well as a Quantity (Qty.) field and Measure (Unit Type) dropdown menu along with a Notes field. Enter the Name or ID of your ingredient to locate it using search:
 |
11. Enter the Quantity of the ingredient used in the recipe and select a Measure (Unit Type). In the following example, the recipe calls for 1 gallon, 2 quarts of pinto beans. In this case, select gallon as the first Measure and enter 1 as the Quantity, then select quart as the second Measure and enter 2 as the Quantity:
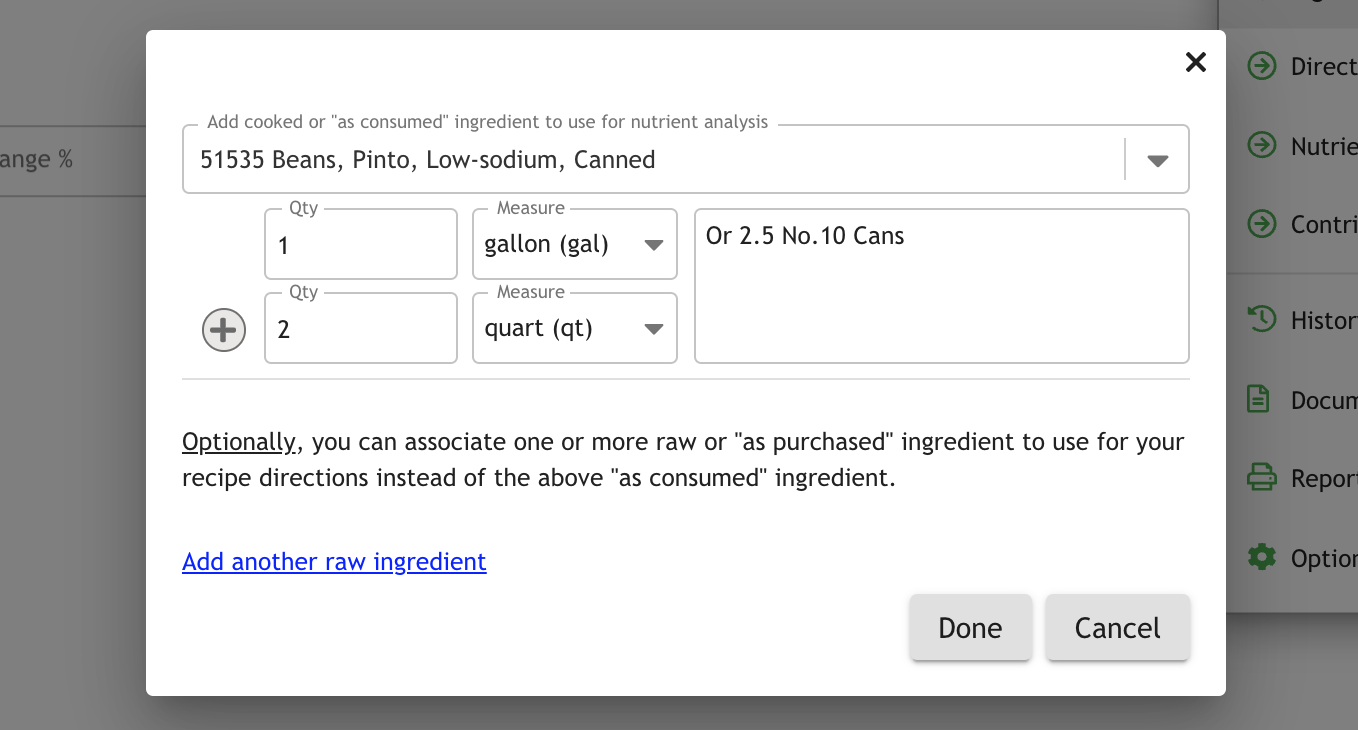 |
When complete, enter a note if desired and click Done.
Repeat steps 9-11 above to enter each ingredient for your recipe.
Ingredients added to the recipe can be sorted in the Ingredient list by dragging the handle to the left of the ingredient name up or down. They can be edited by clicking the Pencil icon or removed by clicking the trashcan icon:
 |
To see detailed information about an ingredient, click the i (info) icon:
 |
12. When all ingredients have been entered, click Directions in the navigation menu on the right. You may also want to Save Progress.
Directions
 |
The Directions page is used to add the directions and steps required for creating your recipe. Ingredients are added one at a time and steps are numbered top down. The Ingredients you previously added to the recipe are selected from the dropdown menu on the left while directions for the ingredients are entered to the right for each step.
If No preparation steps are provided for this recipe, check the provided box.
13. Click the Select Ingredient dropdown menu to choose your ingredient and enter directions for that step in the recipe. In some cases, you may need to select multiple ingredients for a single step, as in the image above.
14. Click Add New to create the next step(s) in your recipe. Select the type of step; Preparation step, Section Title, HACCP Step or Custom Note:
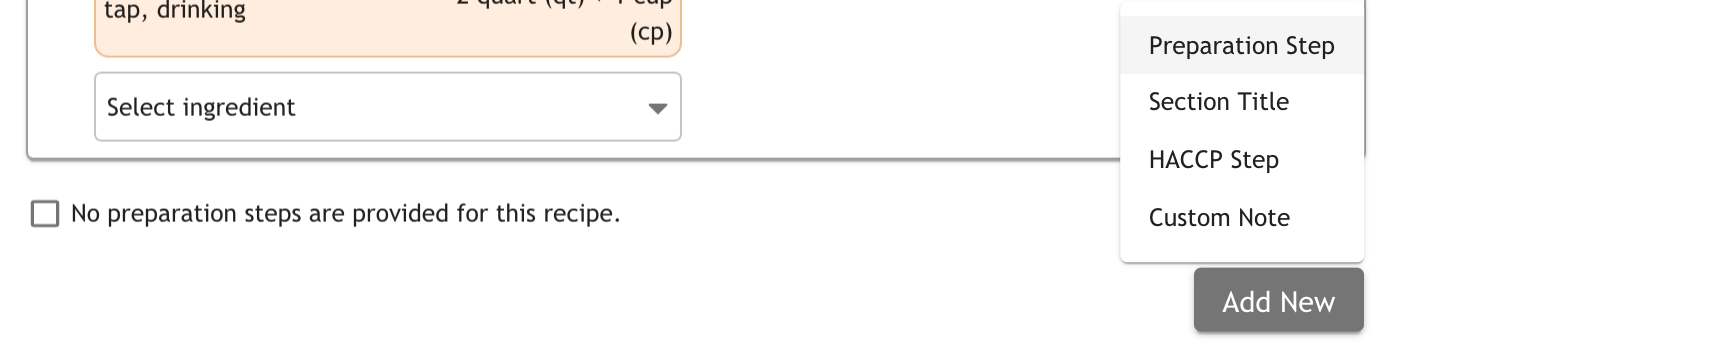 |
15. Repeat steps 13-14 until your directions are complete:
 |
16. When your directions are complete, click Nutrients in the navigation menu on the right. You may also want to Save Progress.
Nutrients
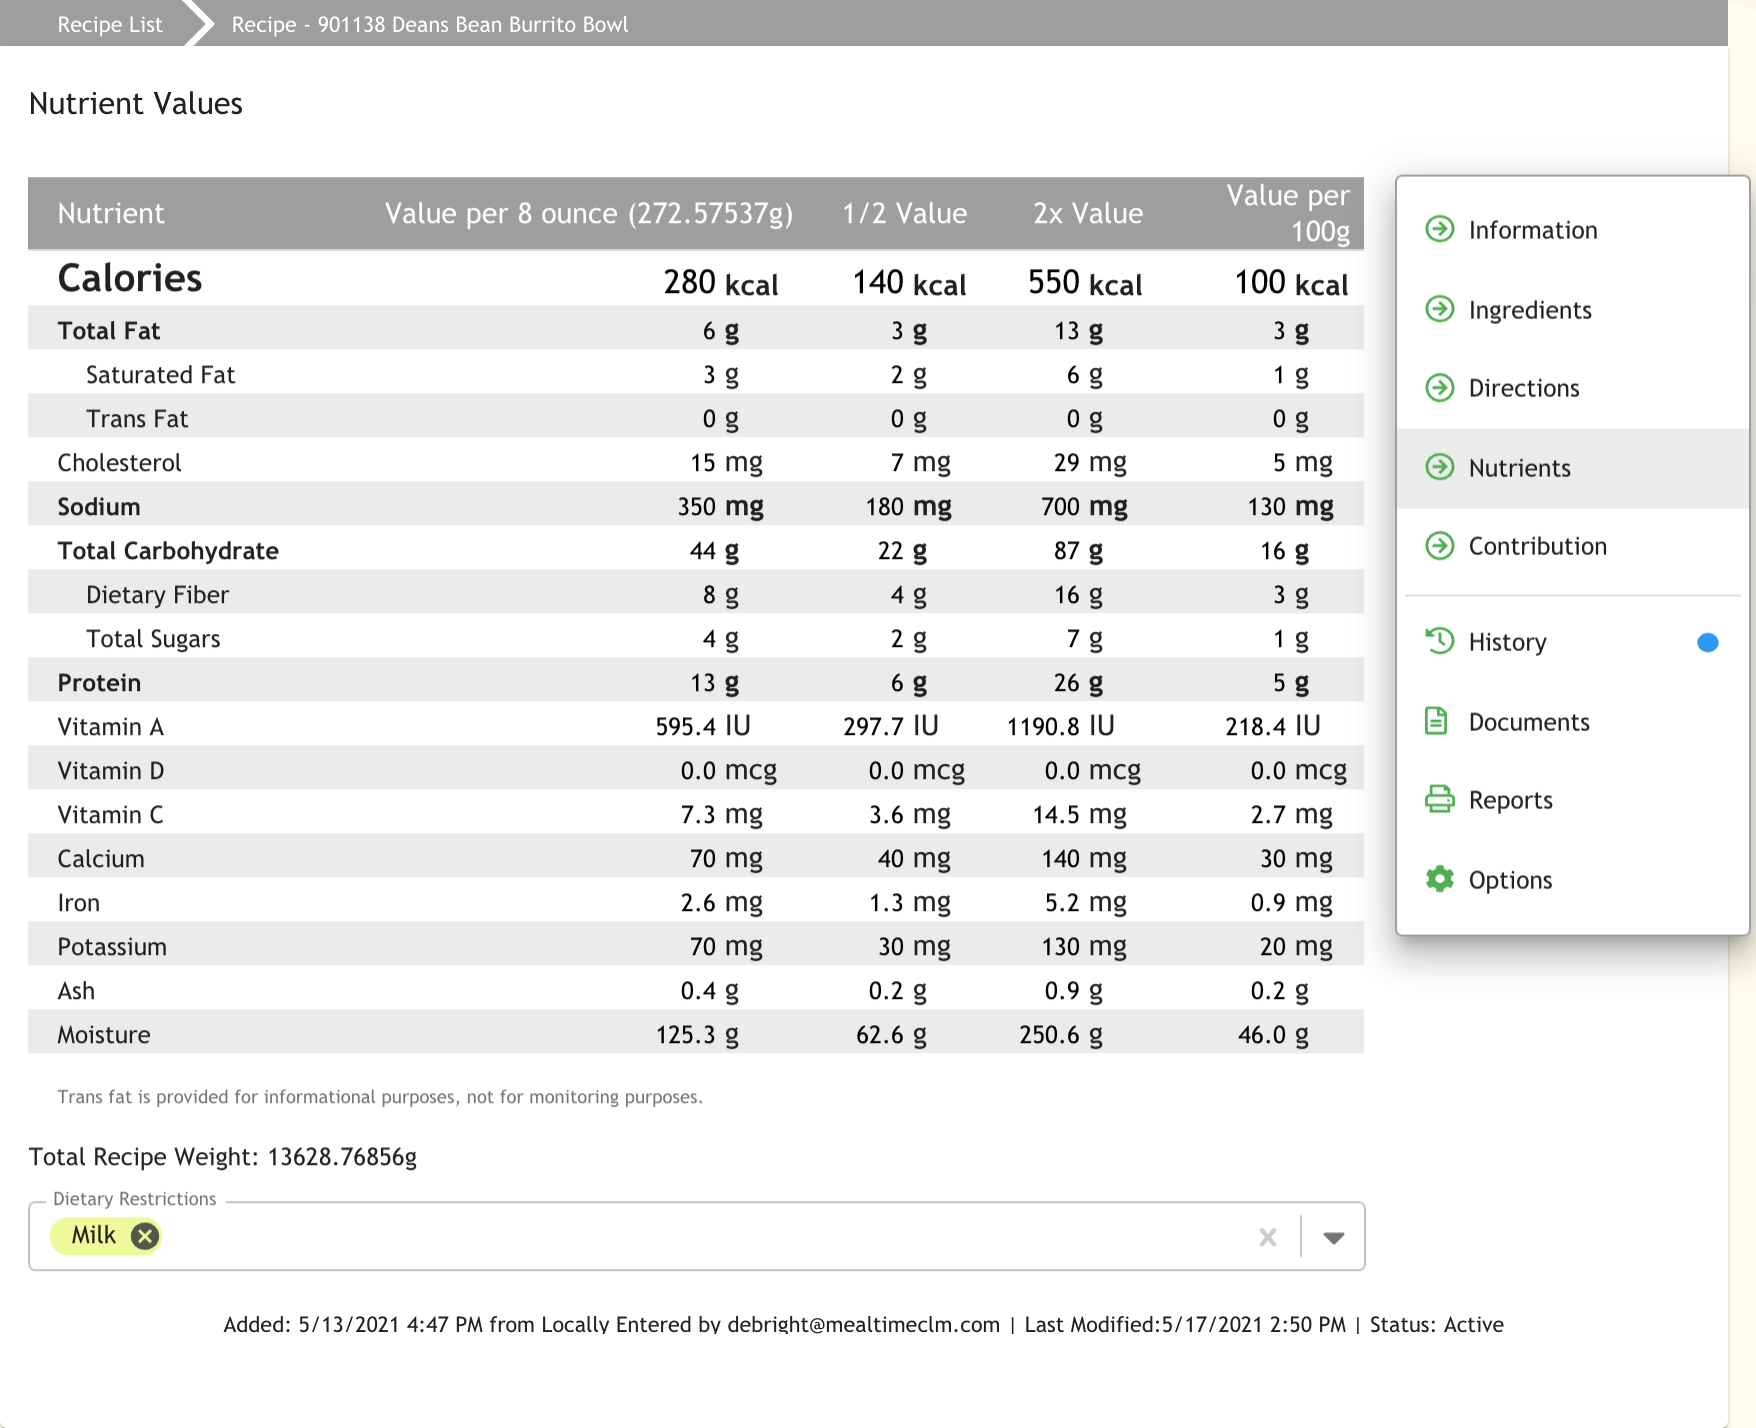 |
The Nutrients page automatically calculates and displays the nutrient values of your recipe per Measure size (as set on the Information page), per half value, twice value (2x) and per 100grams. Any Dietary Restrictions associated with your recipe are selected here.
17. To select a Dietary Restriction(s) to associate with your recipe, click the dropdown menu at the bottom of the page and choose the Diet Restriction from the list:
 |
| NOTE: Diet Restrictions available here may first need to be entered in to MealTime on the Allergens & Diet Restrictions page located in Nutrition & Menu > Settings. |
Once selected, the Diet Restriction label is displayed within the dropdown menu bar:
 |
Repeat this process to add any additional Diet Restrictions to your recipe.
18. When complete, click Contribution in the navigation menu on the right. You may also want to Save Progress.
Contribution
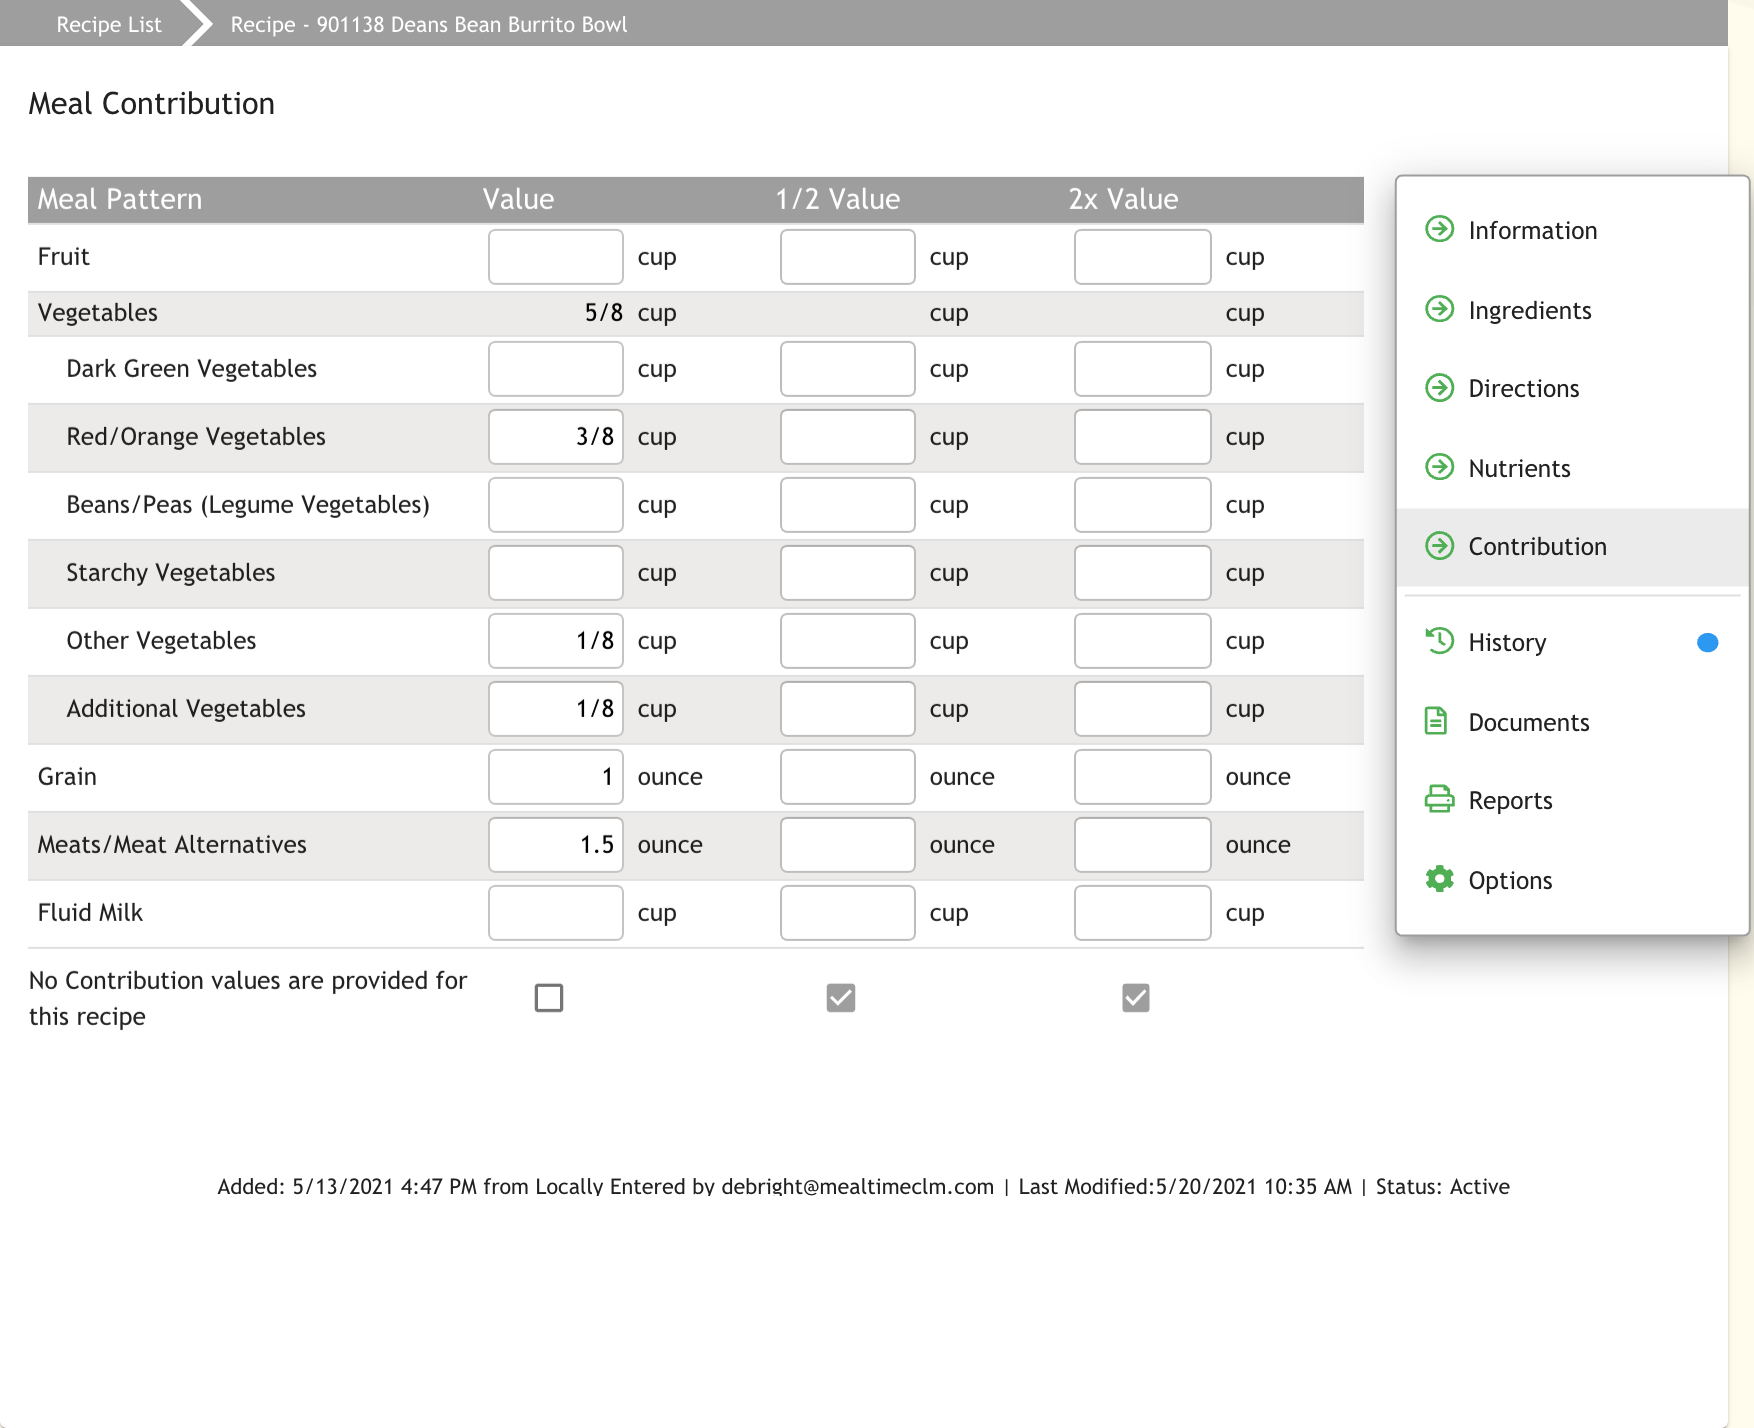 |
The Contribution page allows you to enter the values of each 'food type' contribution included in the recipe.
History
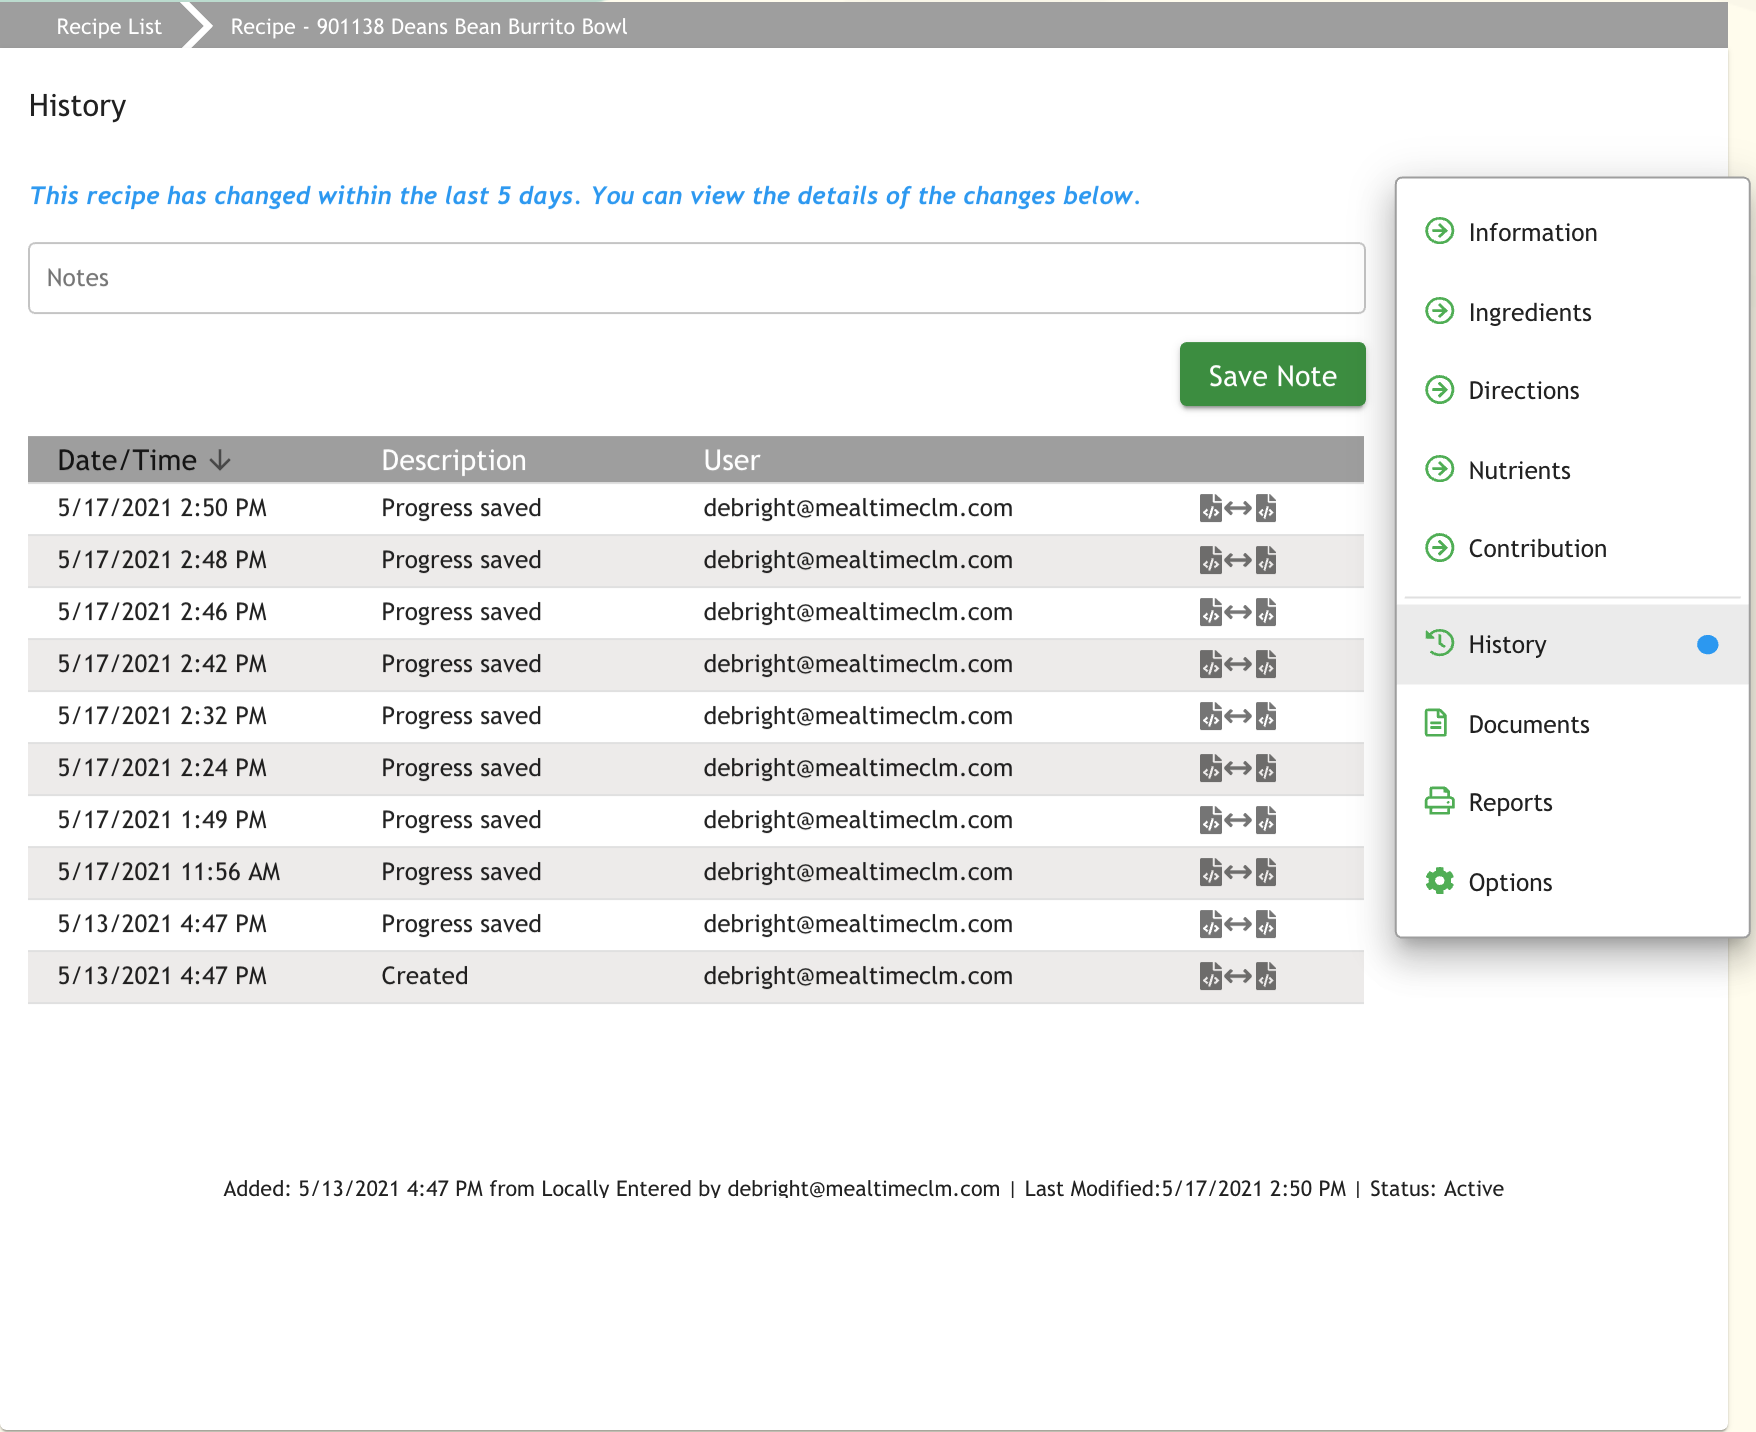 |
The History page provides a listing of changes made to the recipe since it was first created and can be sorted by Date/Time, Description and User. When changes have been made to a recipe a blue dot is displayed to the right of the History button in the navigation menu to notify users.
Each entry in the list provides the ability to compare the changed recipe values to it's previous values.
To see a comparison of changes, click the Compare button:
 |
Documents
 |
The Documents page...
Reports
 |
The Reports page...
Options
 |
The Options page...